Working with Microsoft 365 often requires dealing with Service Health email notifications. In this article, we will go through 3 ways to get rid of notifications we no longer need.
Prerequisites
-
Admin access to configure Service Health notification
-
An account with a mailbox to receive email notifications
-
Power Automate access to create a flow
Filter out unwanted services
First and foremost, let's make the email never arrive. Using our admin account let's go to Service Health (1) > Customize (2, direct link). From here, switch to the Email tab (3):
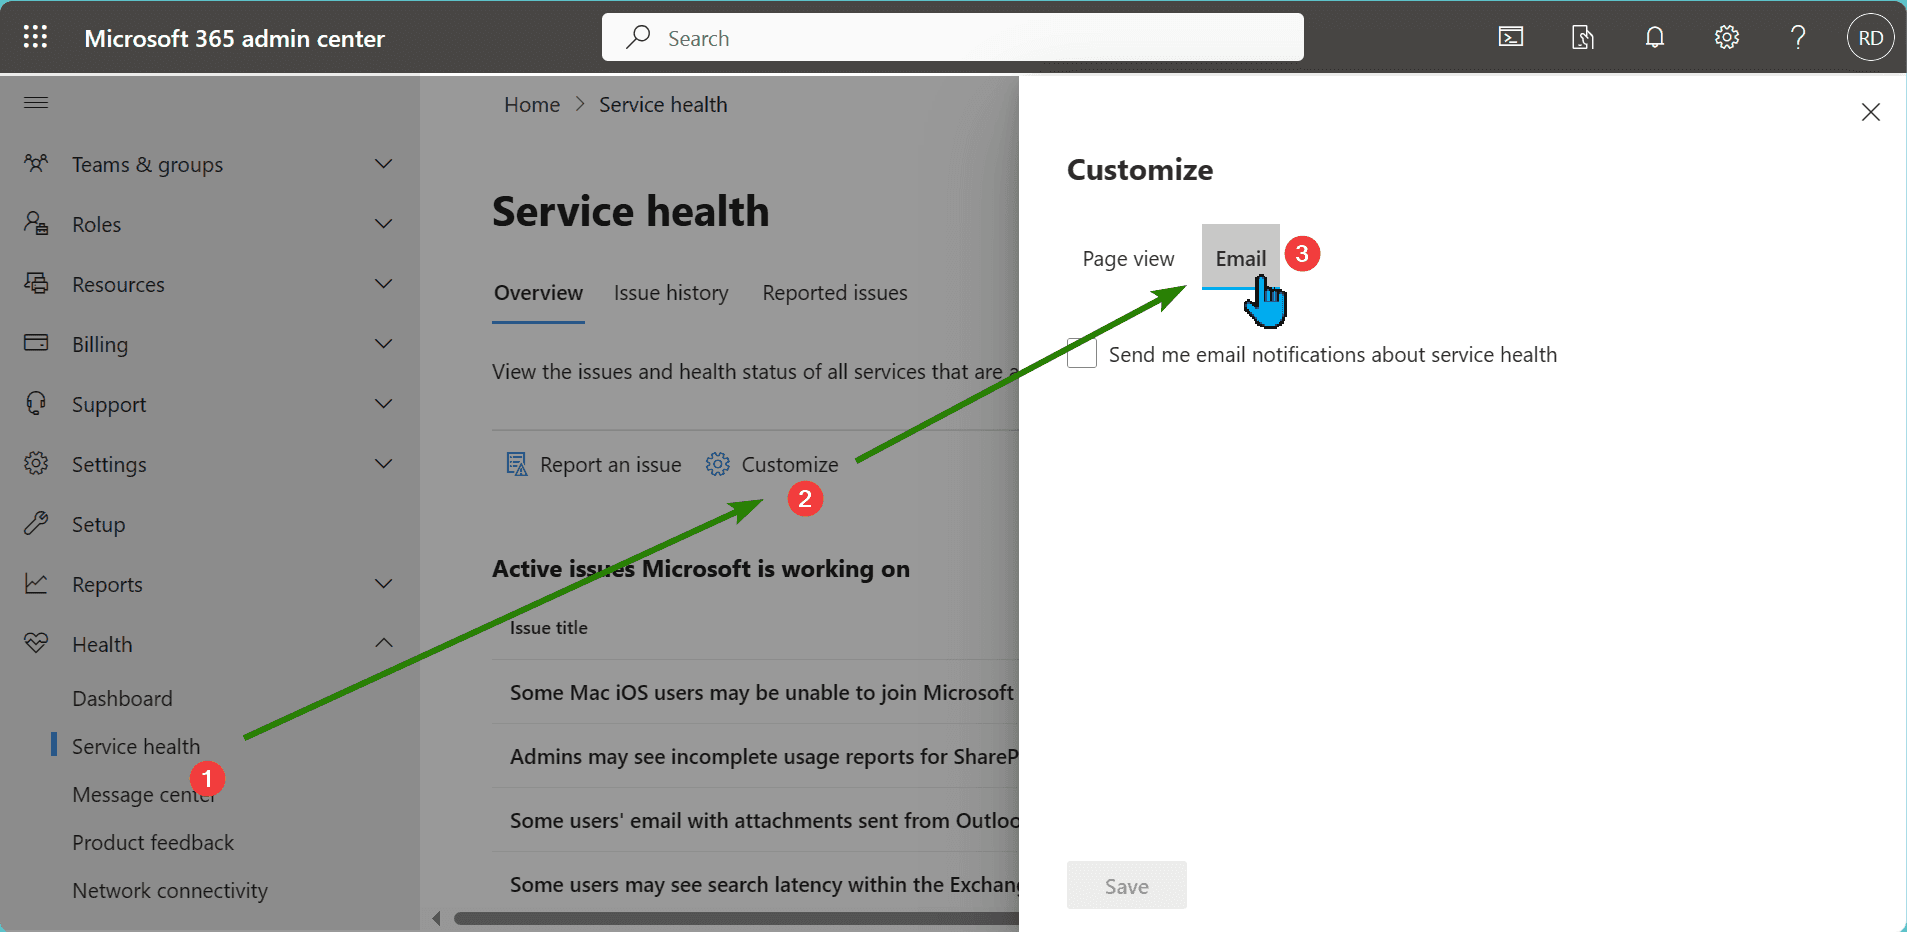
Opening Email settings of the Service Health
Here we check the box to receive emails. Then we put our email address and scroll down to the Include these services section.
If we do not manage some of the services within our organization, we can safely uncheck them. In my case, I am not interested in Azure Information Protection and Dynamics:

Customization tab with some services unchecked
That's all! Let's give it some time (the portal says 8 hours in the success notification) and we have already saved ourselves some time. We will not have to read and archive notifications about the services we do not manage.
Note about the standards
There are some important remarks about the flow we will create in the examples below.
New designer
In the article below I will include screenshots from the new designer. You can access it from the three dots menu from the classic designer:
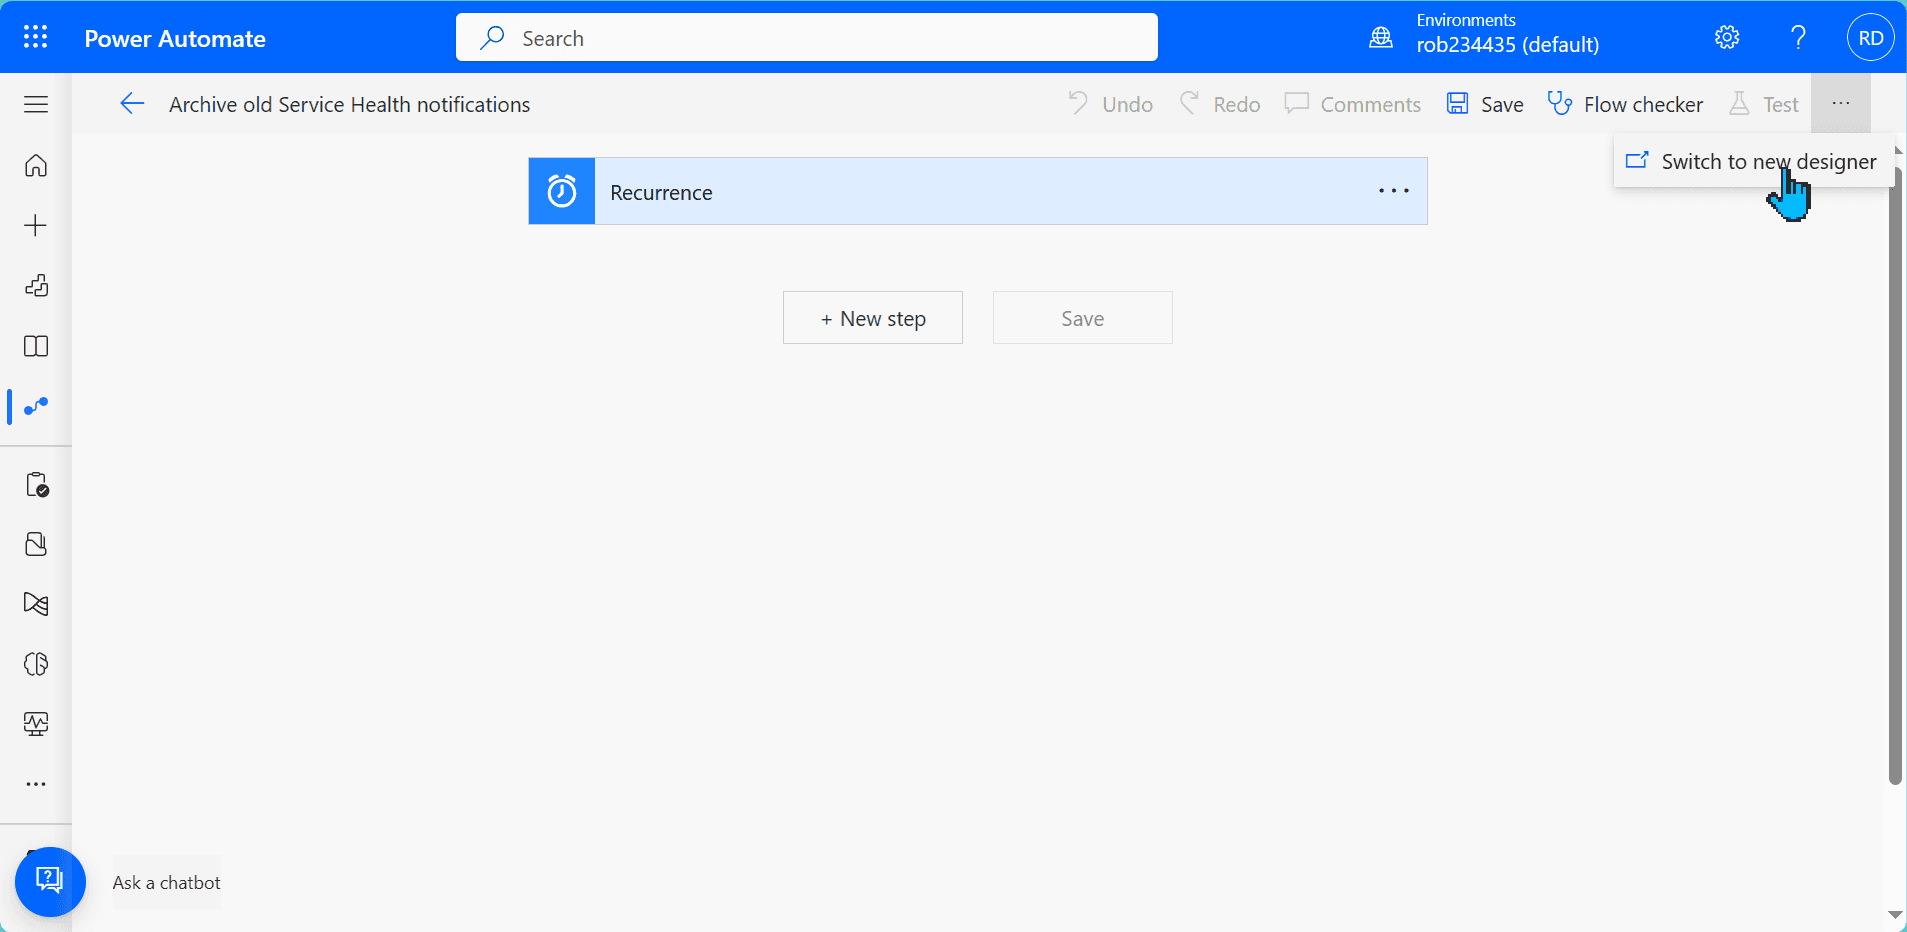
Switching to the new designer
Naming
Most of the actions will be renamed for readability. Screenshots might include either of the names. The screenshot below demonstrates renaming the action:
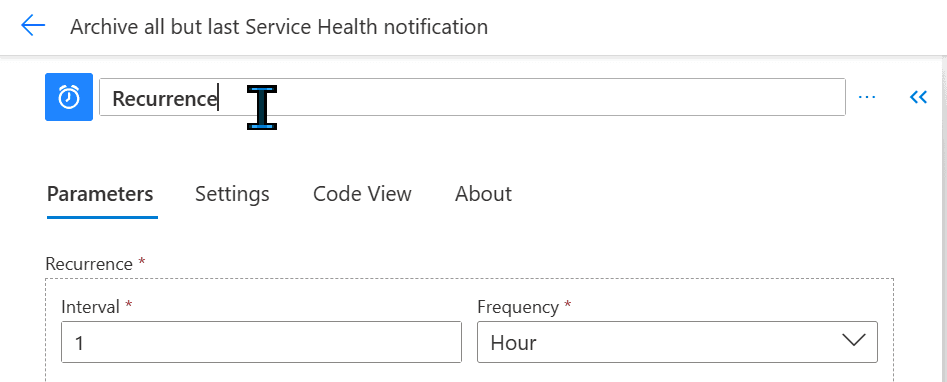
Renaming actions
Arbitrary values
Some of the values are arbitrary. That means you can adjust them to your needs. You can make the flows run more frequently or pull more emails at once.
Archive old notifications
How many times do we need to read notifications older than a few hours? We usually don't need to know about something that happened long before our shift. The same applies to things that happened during our two-week (or more) vacation.
Let's go to make.powerautomate.com and create a flow. Under Create we will choose Scheduled cloud flow:
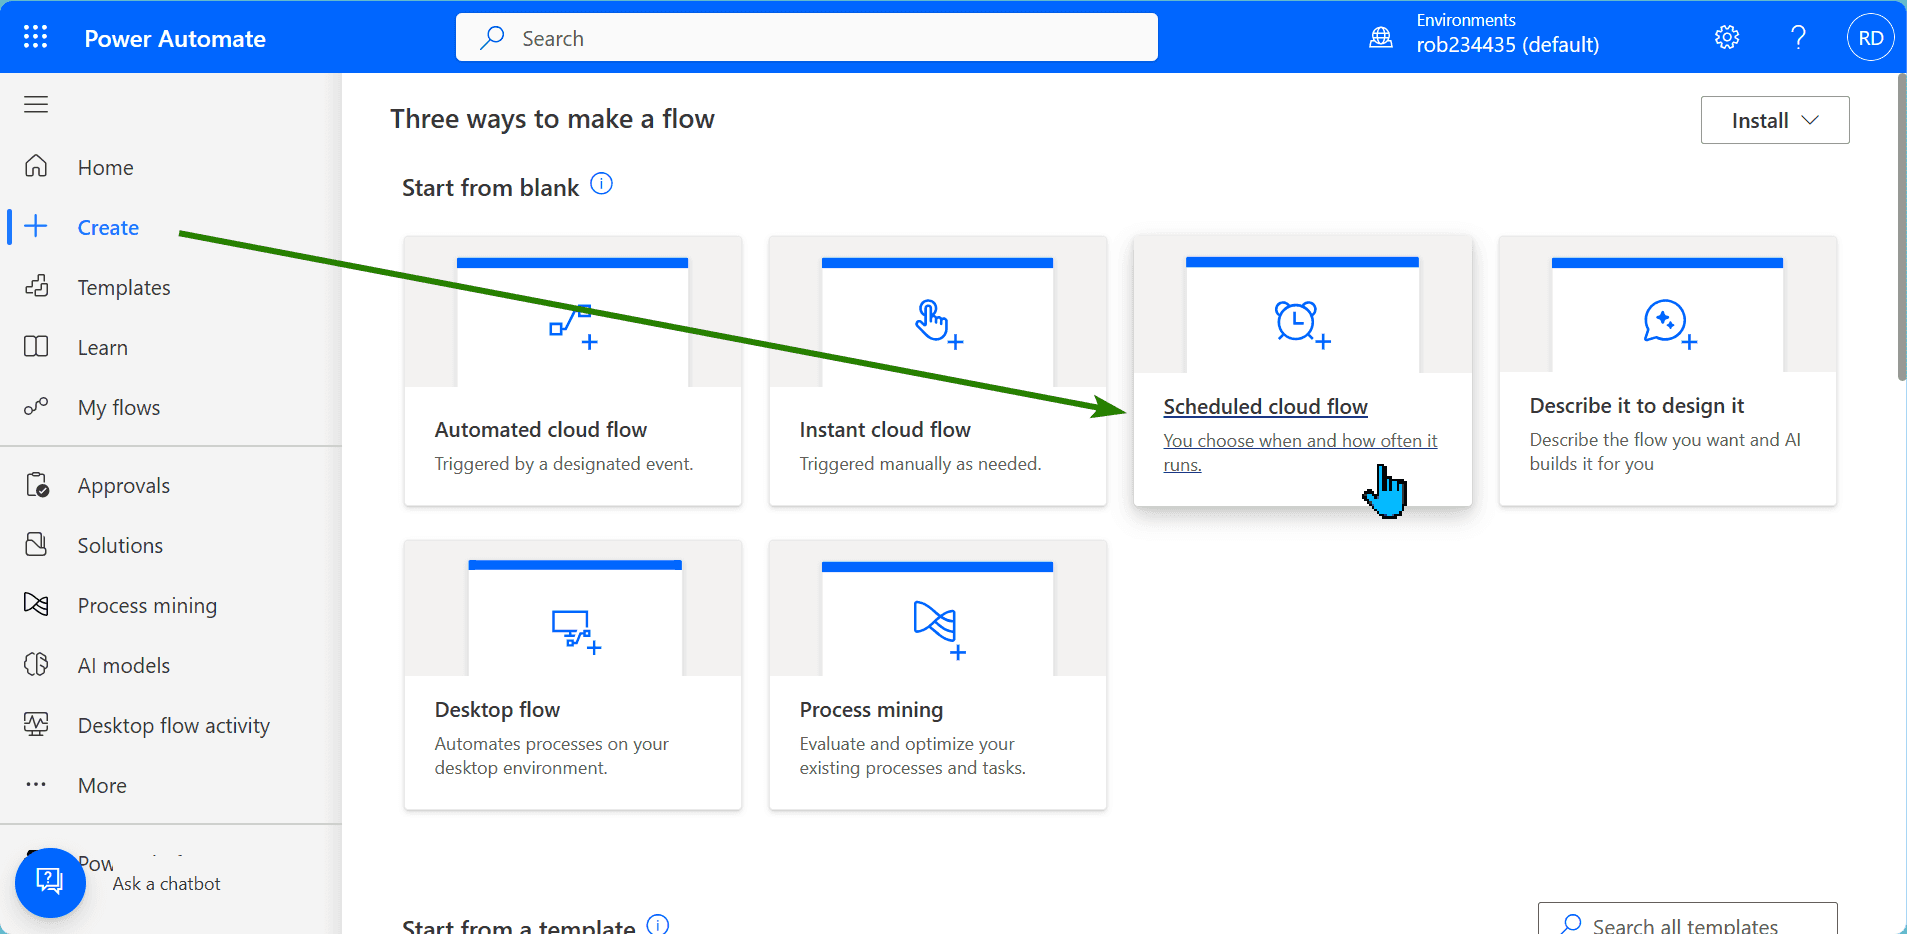
Creating scheduled cloud flow
We will make the flow to run every 3 hours:
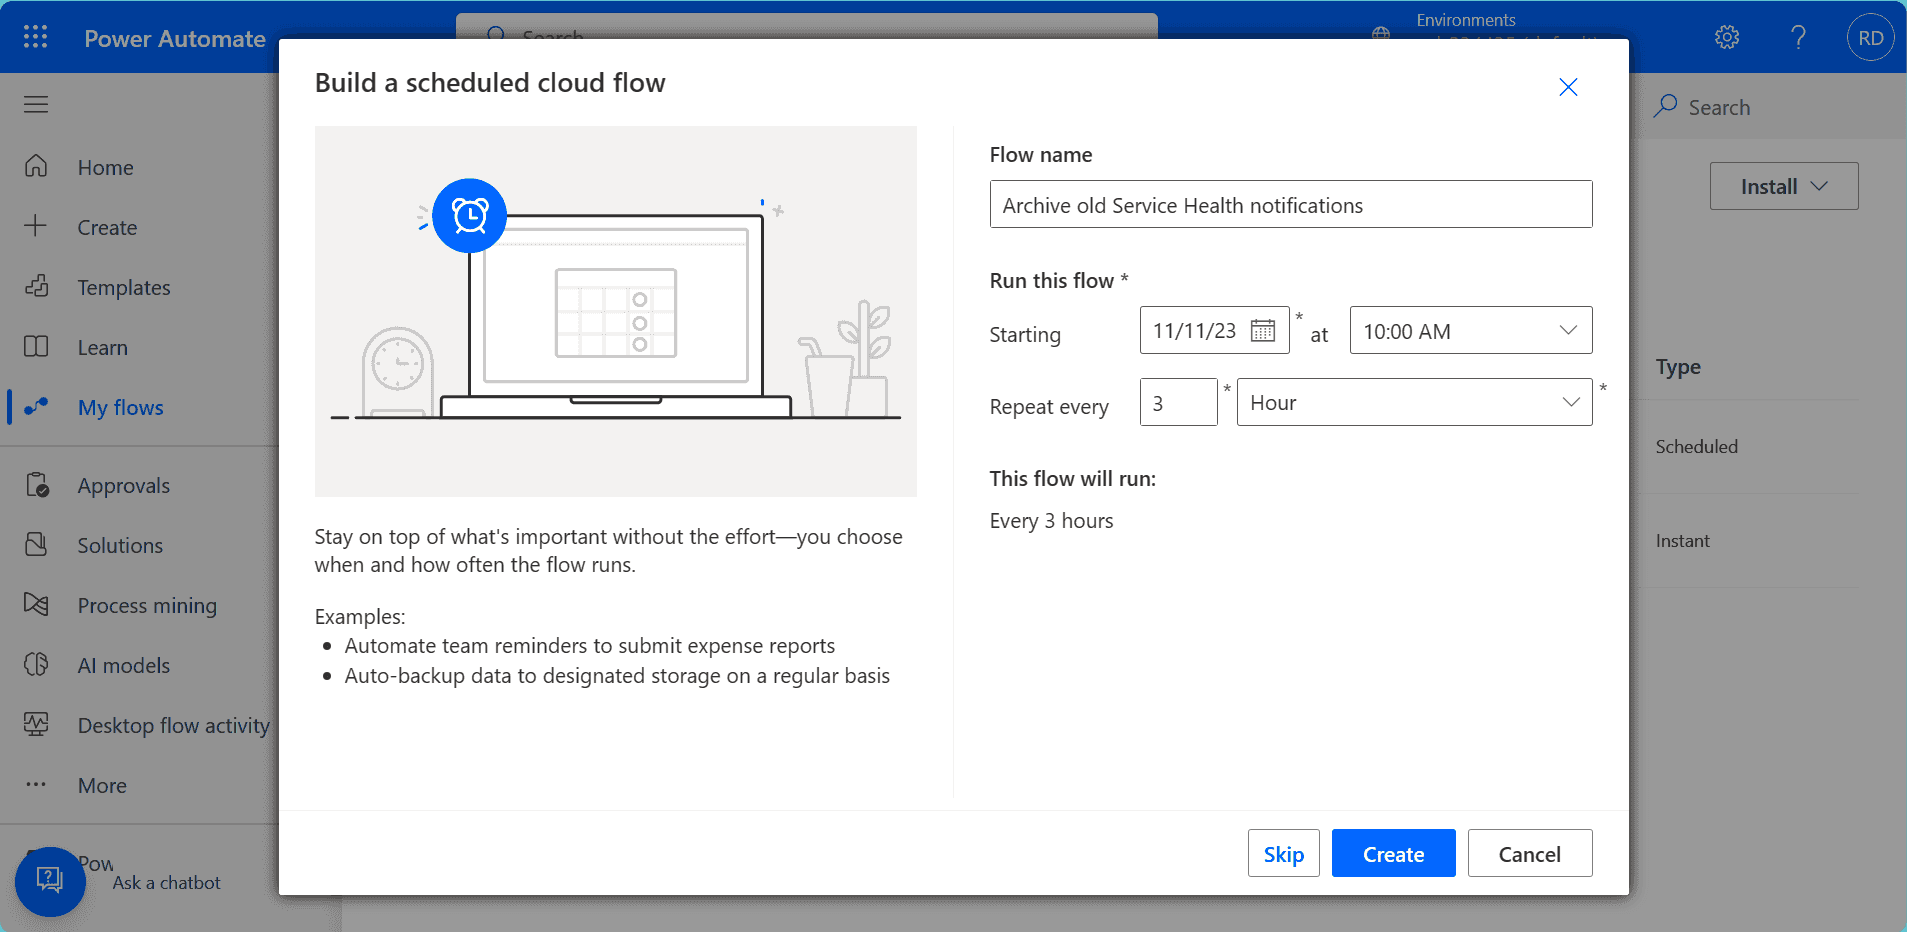
Making flow to run every 3 hours
The first action in the flow will be to get emails. We choose the Get emails (V3) action. We set its properties:
-
Name: Get emails
-
Subject Filter: Service Health
-
Folder: Inbox (unless we have a rule to redirect the notifications to a folder)
-
From: o365mc@microsoft.com
-
Fetch Only Unread Messages: No
-
Search Query:
received<(as a text) followed by expressionformatDateTime(utcNow(),'MM/dd/yyyy') -
Top: 25
Tip
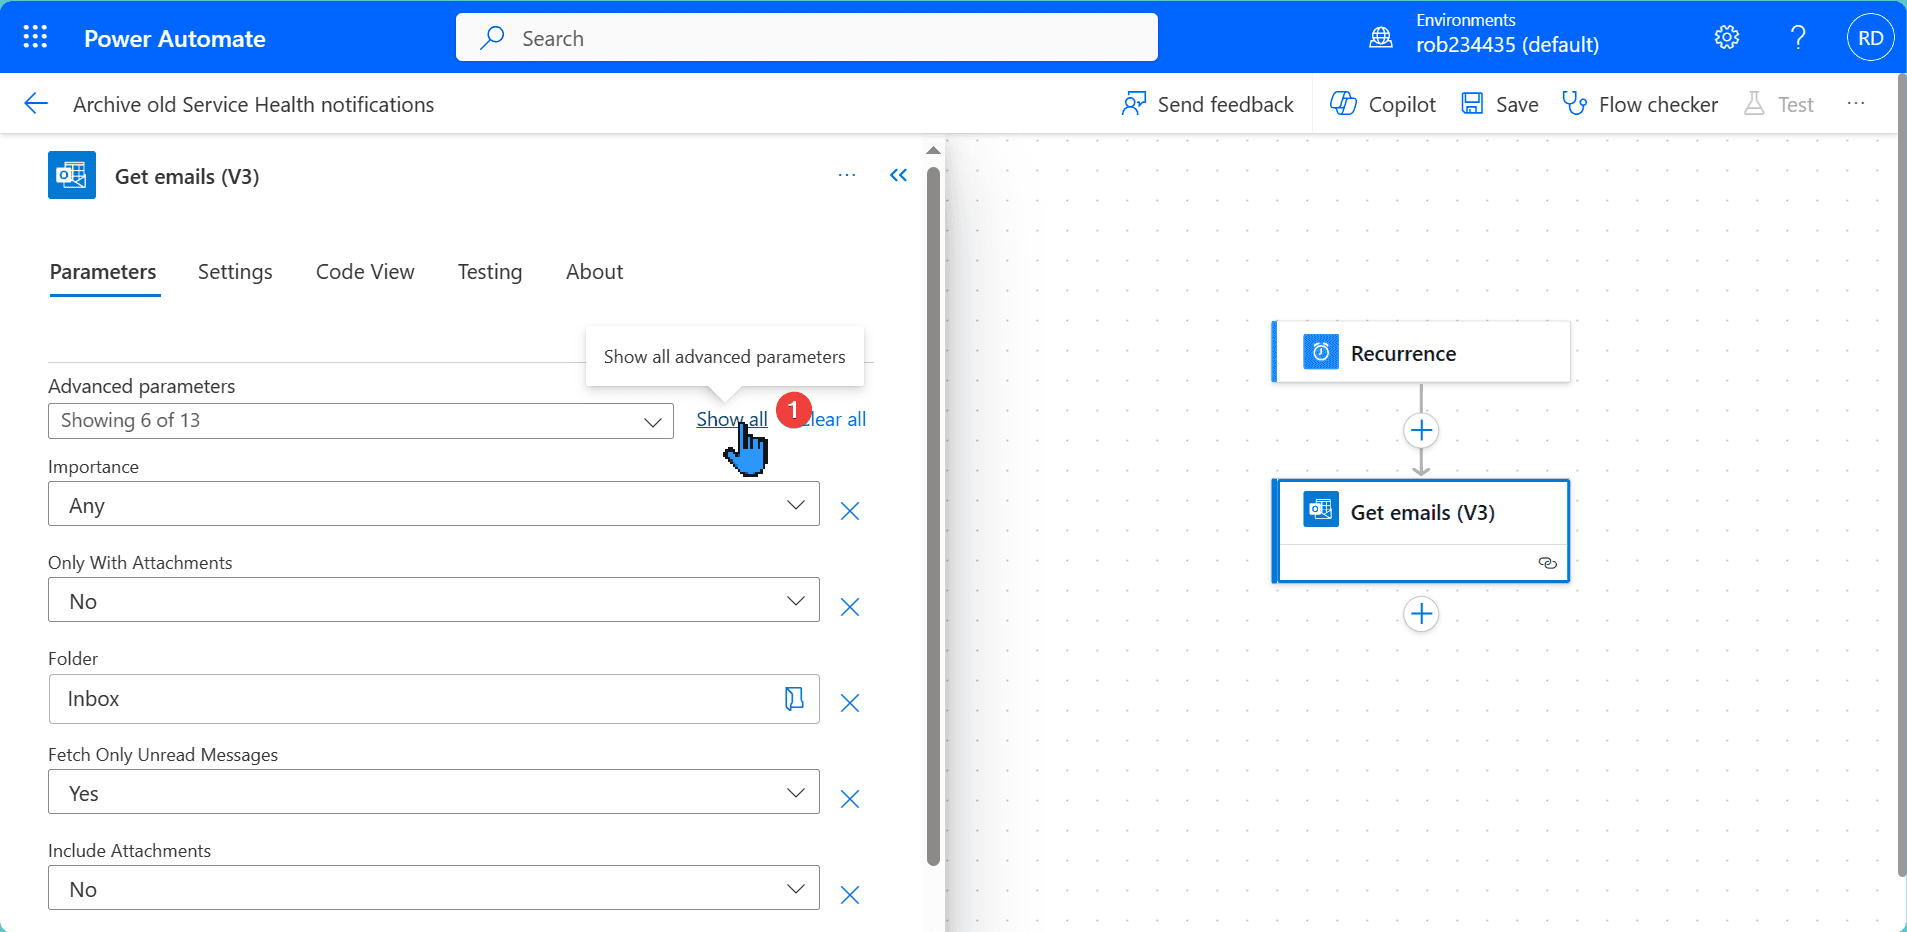
Note that some parameters are hidden under the Show all button (1):
Show all button to uncover hidden properties
The next action will be Apply to each. We will pass body/value property to it:
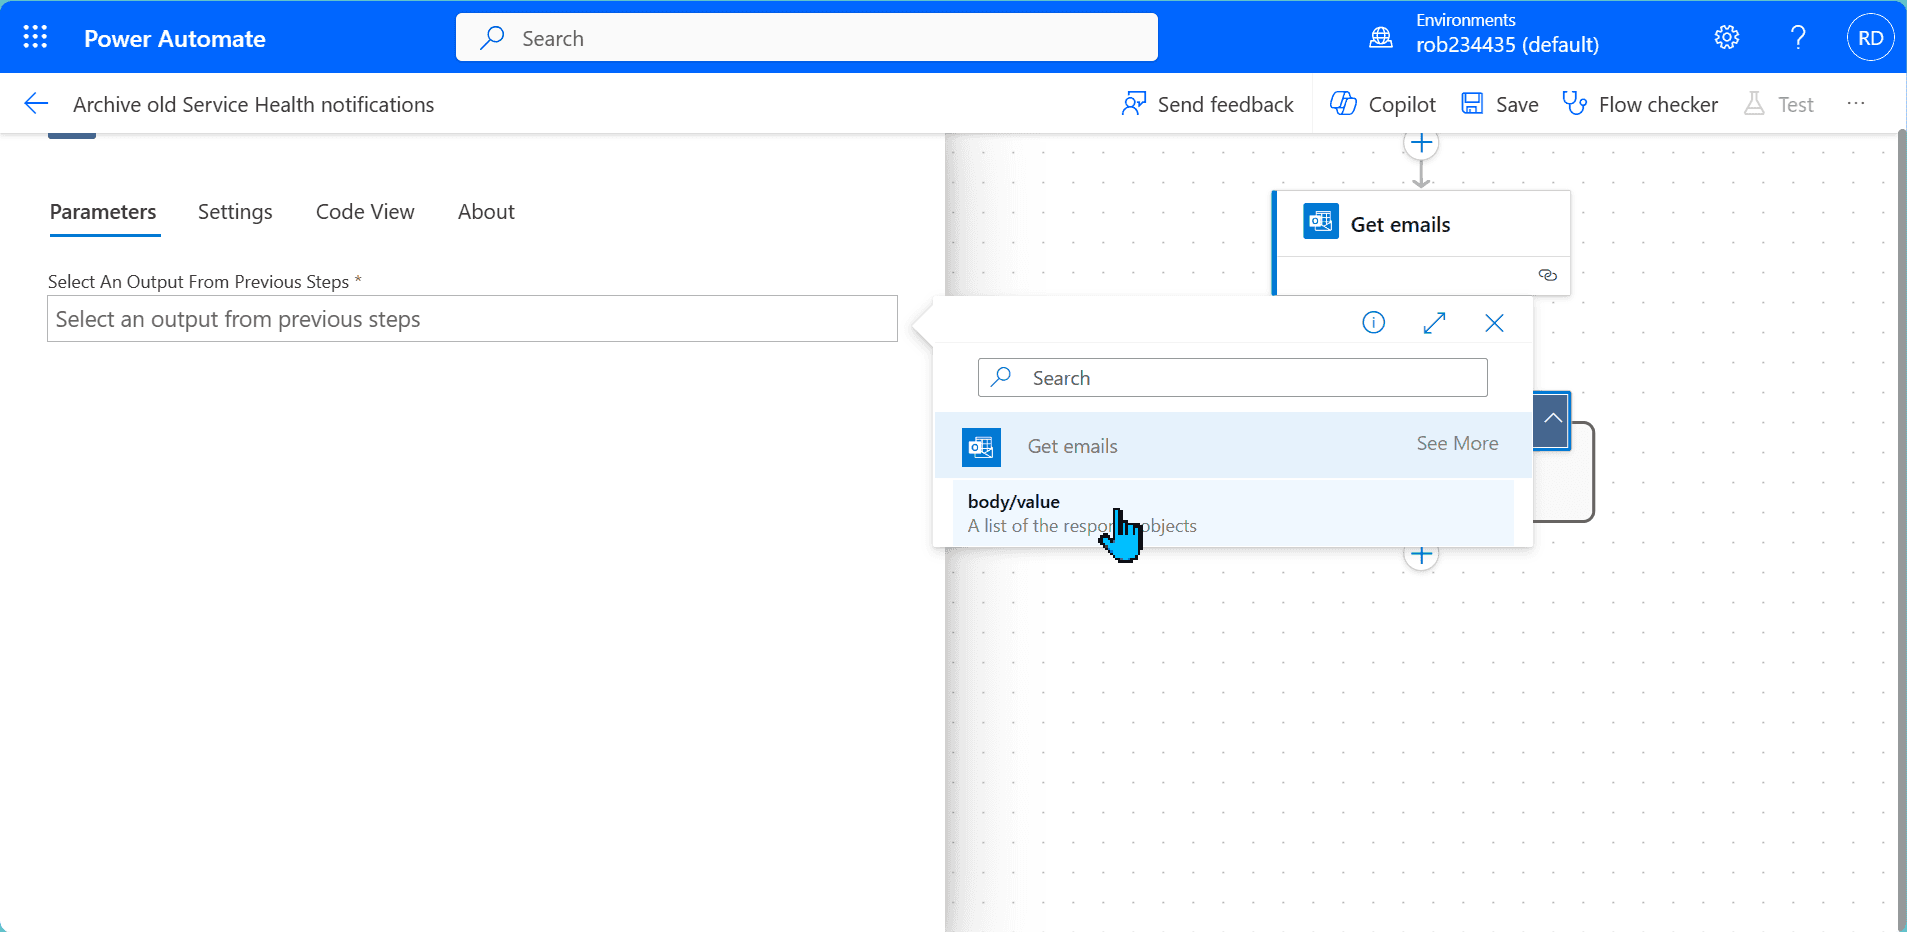
Passing output from the previous step
Inside Apply to each we add the Move email (V2) action with the following parameters:
- Message ID: property
Message Idfrom the Get emails action - Folder: any folder to store archived notifications
Tip
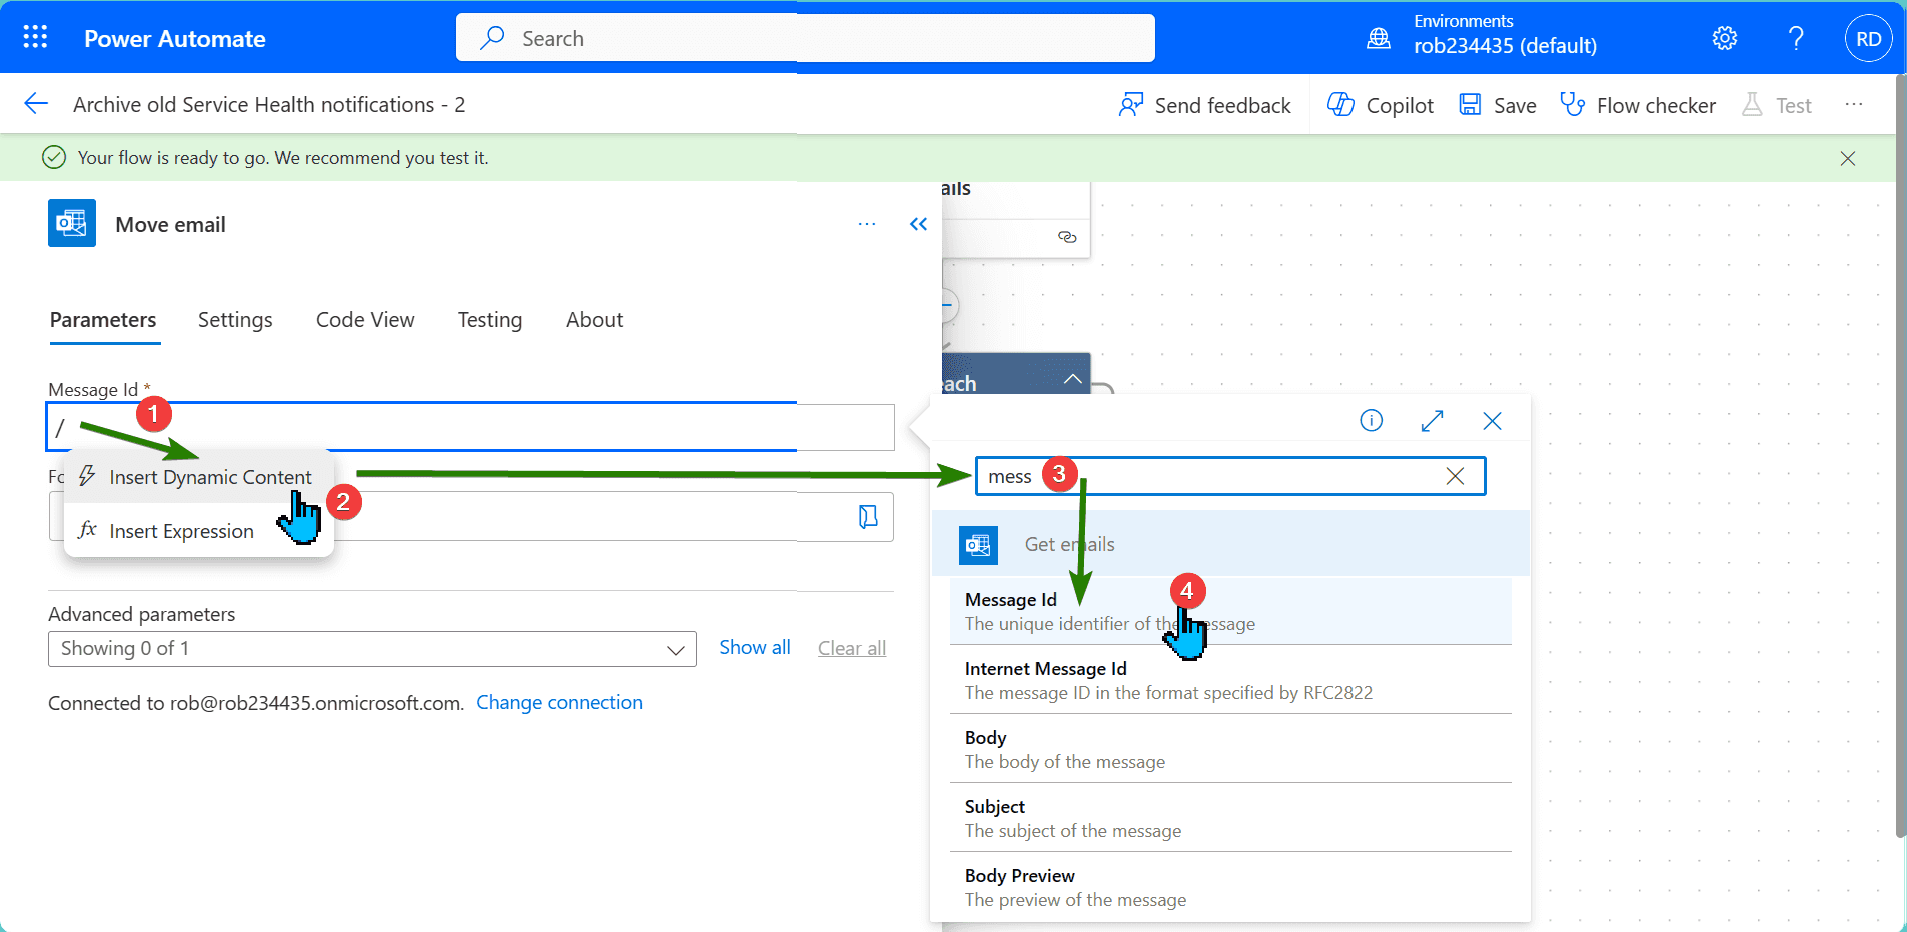
Message Id is not displayed by default. To insert it type the backslash in the field (1). Then choose Insert Dynamic Content (2), type the name into the search field (3), and choose the property from the list (4):
Accessing Message Id property
You can download the flow here: ArchiveOldServiceHealthNotifications.zip.
Leave only the last notification
The last (but not least) problem with Service Health email notifications is… updates. Sometimes you wake up and see many emails about the same issue. If the problem happened overnight, there is a chance it is already resolved.
Regardless of the current status, we rarely need the full history. We need to know whether the issue is ongoing or already resolved. We can dig more ourselves if needed.
Let's go to make.powerautomate.com and create a flow. Under Create we will choose Scheduled cloud flow:
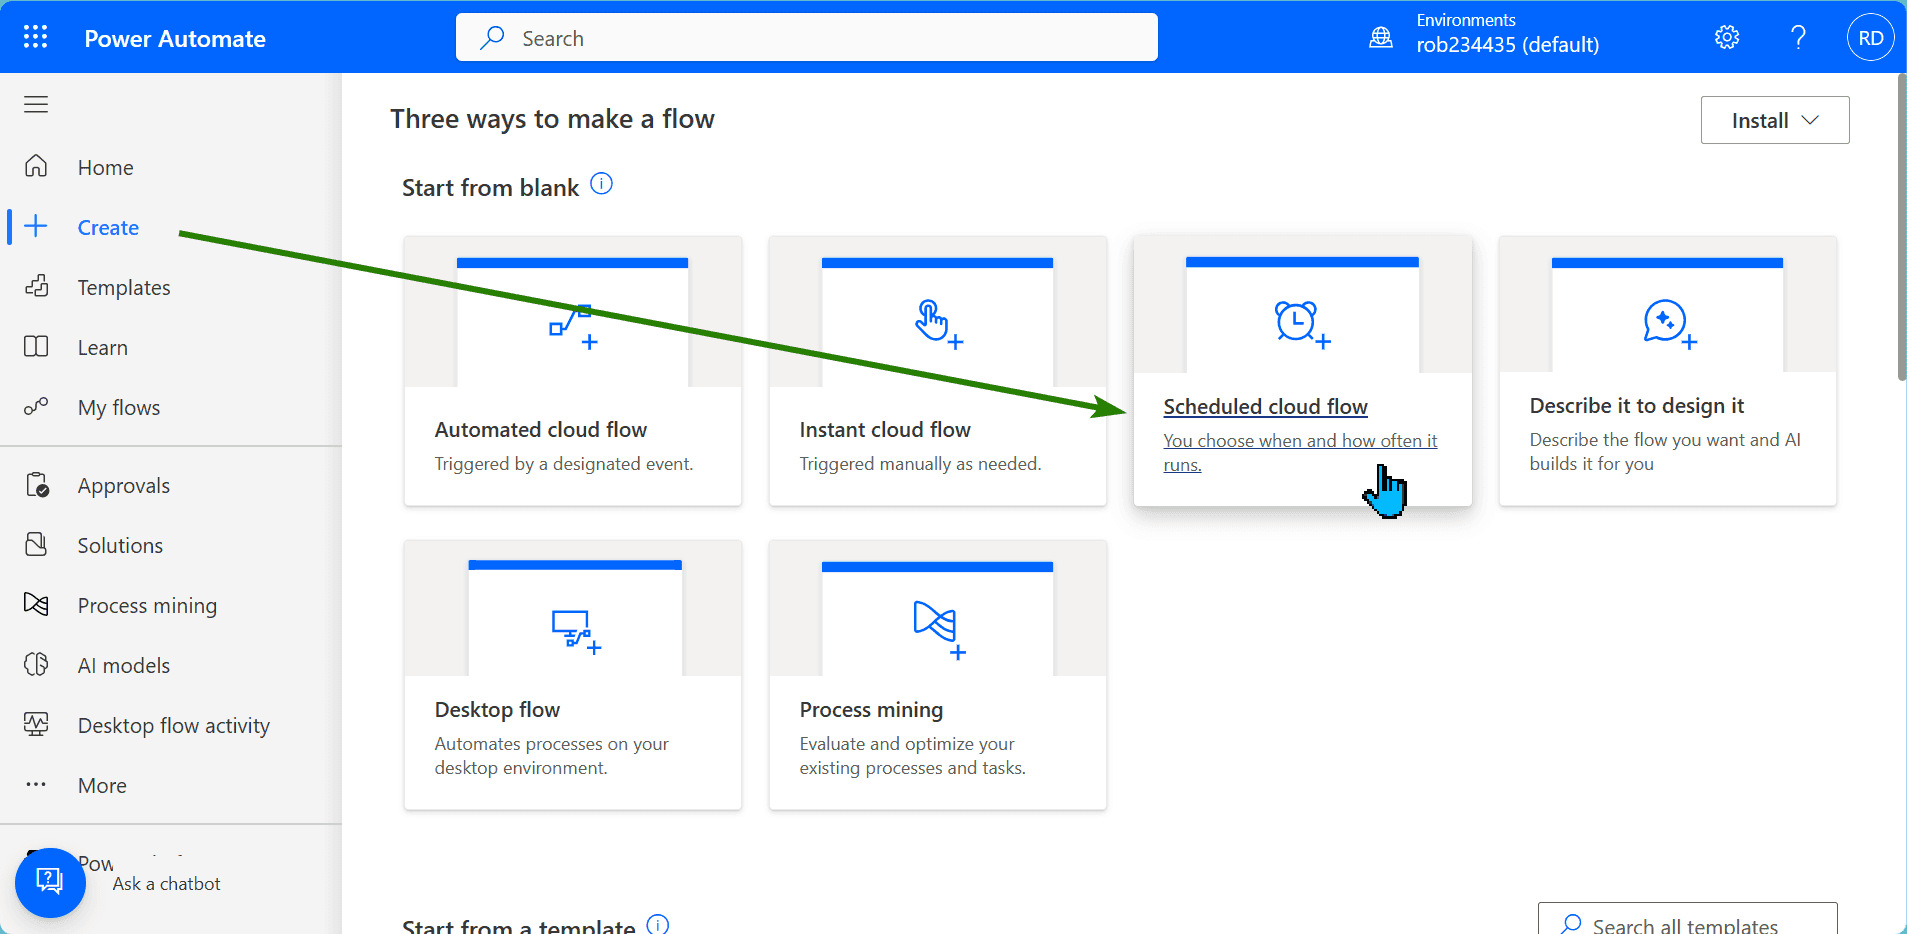
Creating scheduled cloud flow
We can choose how frequently the flow should run. I run it every hour in this example:
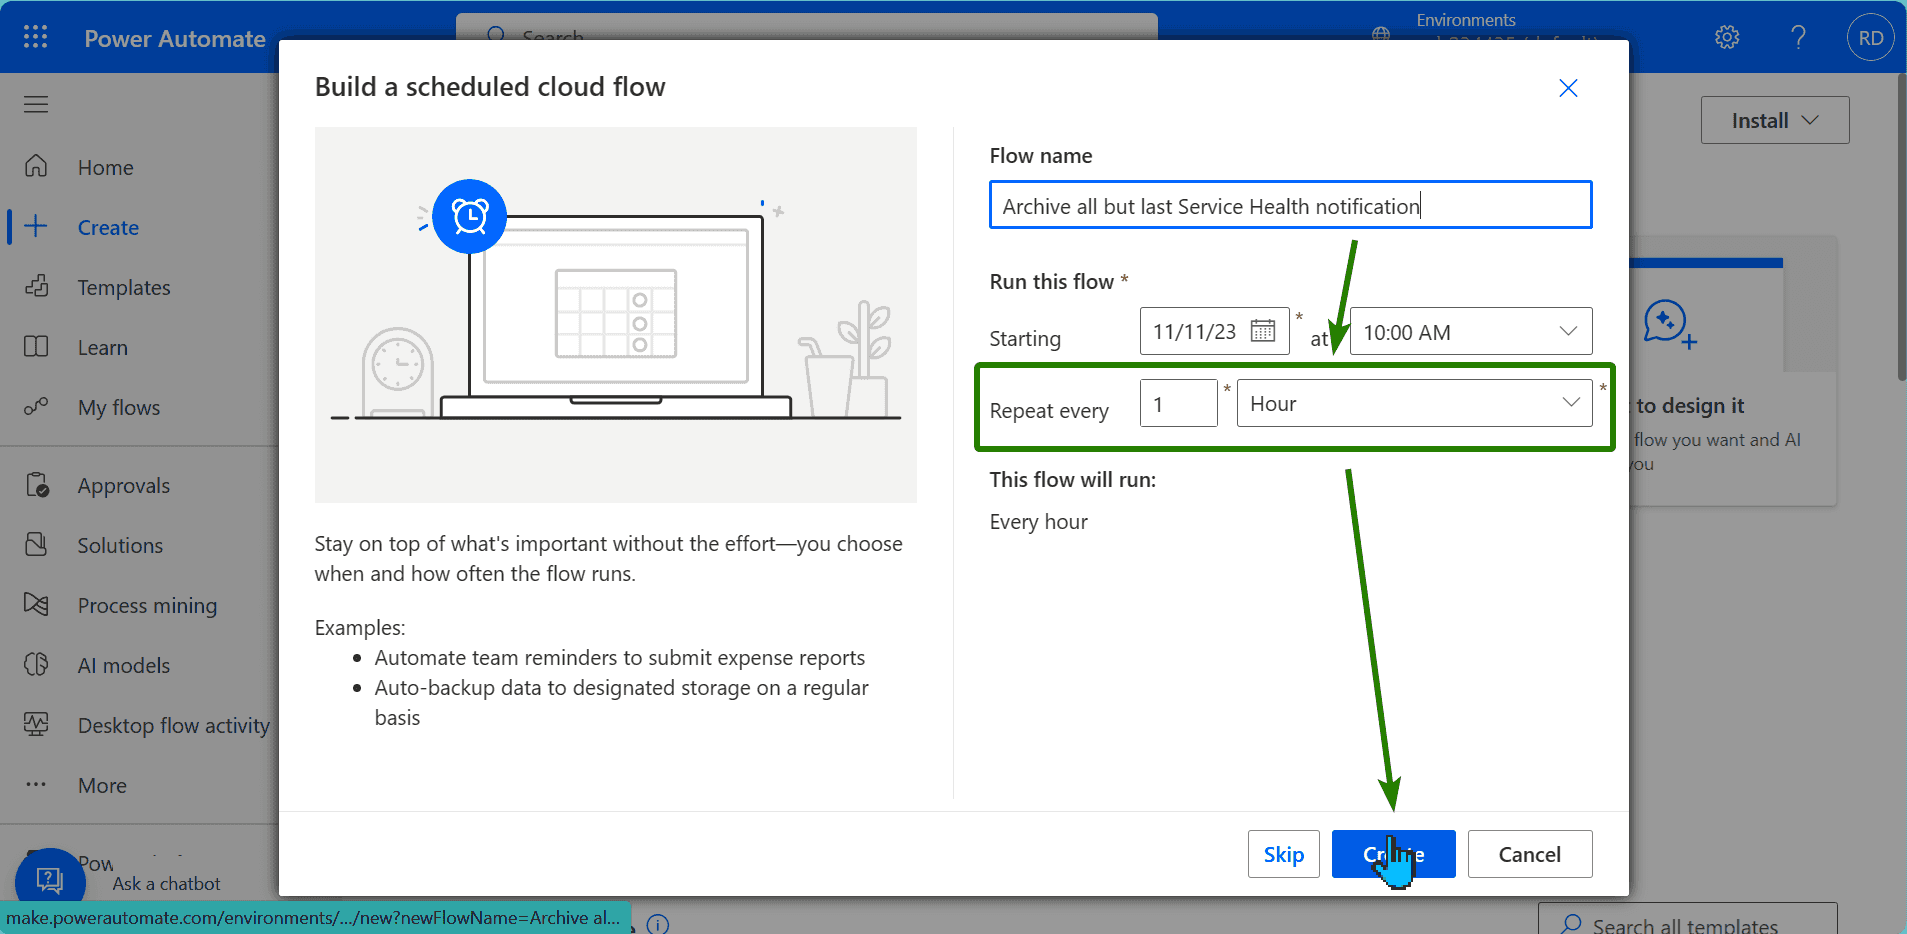
Configuring scheduled flow properties
The first action in the flow is to get emails. It is Office 365 Outlook > Get emails (V3). We will use the following properties:
-
Name: Get emails
-
Subject Filter: Service Health
-
Folder: Inbox (unless we have a rule to redirect the notifications to a folder)
-
From: o365mc@microsoft.com
-
Fetch Only Unread Messages: No
-
Top: 25
The next action is Control > Apply to each. We configure it to take the body/value field from the previous step:
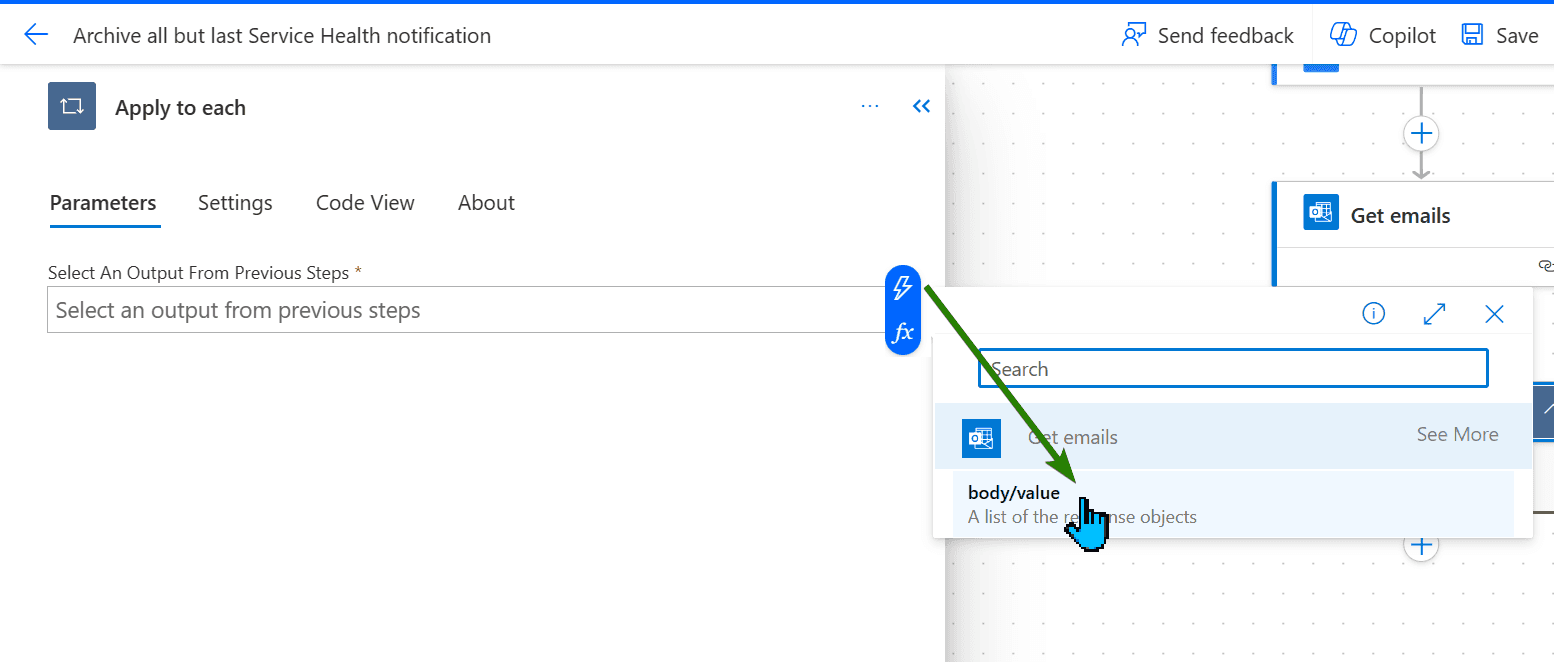
Configuring Apply to each action
Inside the loop, we will add a Data Operation > Compose action. It will store the current item:
- Name: Email
- Inputs:
item()(as an expression)
Warning
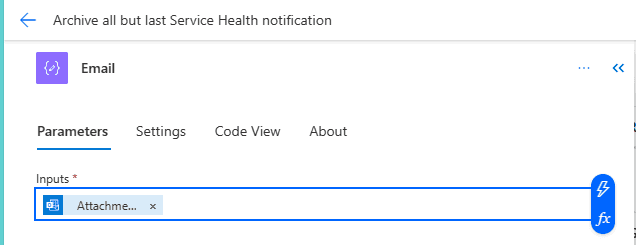
For some reason, the expression might be replaced by the Outlook icon with the text Attachment (as in the screenshot below). Do not worry, it will be fixed after saving and refreshing the page.
Incorrect input value shown in the action
Here is how the Compose action should look like:
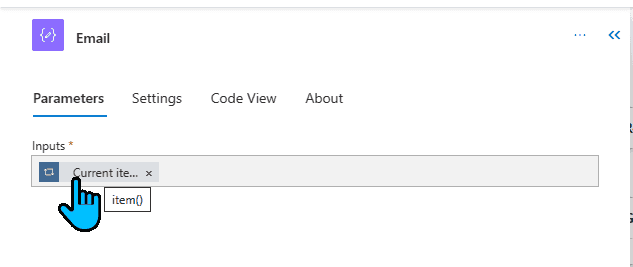
Configuration of the Compose action
Now, the tricky part. We need to check if two emails are referring to the same issue. We will compare subjects.
We use Data Operation > Filter array action. Its configuration is:
- Name: Filter array
- Filter query:
item()?['Subject'](as an expression) is equal tooutputs('Email')?['subject'])(as an expression)
The action will find all emails with the same subject as the current item in the loop.
Now we need to make a Control > Condition action. It will check whether:
- There are more than two items found in the Filter array AND
- The current item is not the most recent with this subject
In the condition, we add two rows joined with the AND operator:
length(body('Filter_array'))(expression) is greater than 1first(body('Filter_array'))?['id'](expression) is not equal tooutputs('Email')?['id'](expression)
Tip
We use
body('Action_name')which is a shorthand ofactions('Action_name').outputs.bodyoroutputs('Action_name')?[body/value].
The action should look like below:
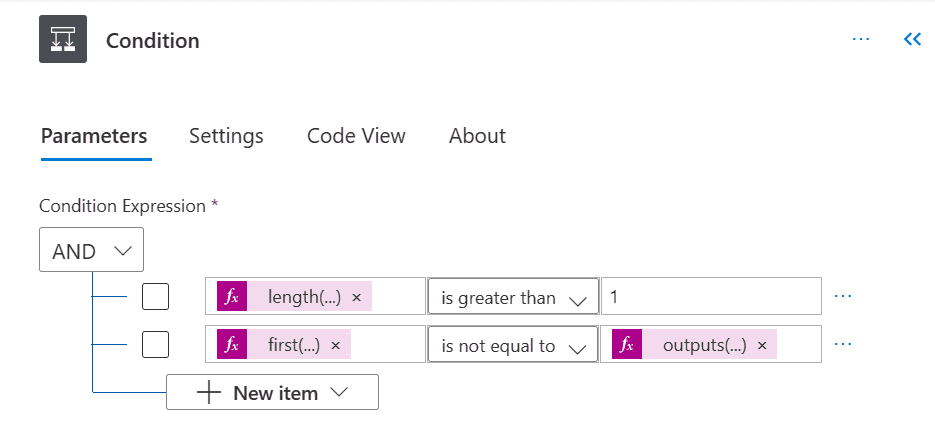
Condition action settings
Last, but not least - moving email. If the condition above evaluates to true, we will move the email to the archive folder. If not, we will do nothing. We will use Office 365 Outlook > Move email (V2) action with:
-
Name: Move email
-
Message Id:
outputs('Email')?['id'](expression) -
Folder: Archive
You can download the flow here: ArchiveAllButLastServiceHealthNotification.zip.
Warning
When importing the flow, make sure to open it and select the folder in the Move email action. Otherwise, the flow will error when it tries to archive the duplicate.
Summary
We have demonstrated three ways to limit the number of unnecessary emails coming from Microsoft 365 Service Health. I personally try to achieve inbox zero as much as I can, do you?
If so, share your tips how to do that in the comment section below.
